
A while back we did a review of the IKEA Bekant Sit and Stand Desk. As you probably know, the IKEA Bekant desk in its standard configuration comes in a 63” width which in our case was too wide for our working cubicles. Too wide by 3” to be exact. When we purchased one we noticed the way it was was built, and figured out that it wouldn’t be too hard to reduce its size, albeit with a few hacks. In this post, we will discuss how we were able to hack the 63” Bekant desk using the IKEA catalog and build a 55” variation of the IKEA Sit and Stand desk which we have dubbed the Frankenstein. Scary sounding, but honestly, it was worth the effort!
1) Purchasing the parts at IKEA
Maybe the most difficult part of this whole process is actually purchasing the parts. It used to be that the parts for the Sit and Stand desk were all in the self-serve area of IKEA so getting them was easy-peasy, but it seems that IKEA keeps changing where they store those items. We figure they don’t like customers buying up inventory generally meant for one purpose and used for another, or maybe they are onto us! I always figured I was being tracked via my iTunes purchases of ABBA’s Greatest Hits …
The first time we did this (yes, we’ve done this a few times), the 55” table top was in self serve and the underframe was available at the pickup area (where you pay for the item first, and then someone brings them to you). That was easy. The second time, both items were in the pickup area so we had to visit a few different clerks and get two order sheets for the pickup area. Looking at their website today, it appears the underframe is now available in self serve but the tabletop is under pickup.
In any case, you need to be a bit clever in order to get what you need. The key is that you have to go twice to see a clerk and request just the item that you need, because (as mentioned previously) they might get wise to the inventory hack you are performing. I suggest you come up with a story that you bought a Bekant before and it got damaged and you just need that part. I mean, come on … didn’t we just beat the Swedes in the Olympics Hockey finals?! I think they owe us this one without getting suspicious.
Once you have the parts, the rest is straightforward as long as you own or can borrow a bench saw,a drill and the right bits for cutting metal (more on that to come).
2) Purchasing the parts at hardware store
Unfortunately because the 55” Bekant tabletop does not have the same hole patterns that are used on the 63” tabletop, we need to buy some screws and a few washers. You will need 12 size 10 – half inch screws.
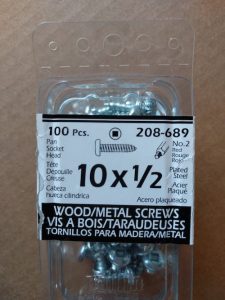
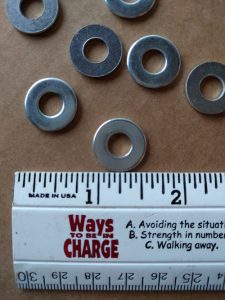
Just to be clear. They are size 10 (the size of the screw head) and are half inch long. You will also need 12 half inch washers. Note I am not 100% sure of the size. They were in a bulk pile when I picked mine up. Look at the picture for an idea of the size. If you’ve read this far, I’m sure you can figure this out.
You can also use a few tie wraps. 5 to 10 will do. You can substitute other types of restraining straps like twist ties or rubber bands instead if you prefer.
3) Making the cuts
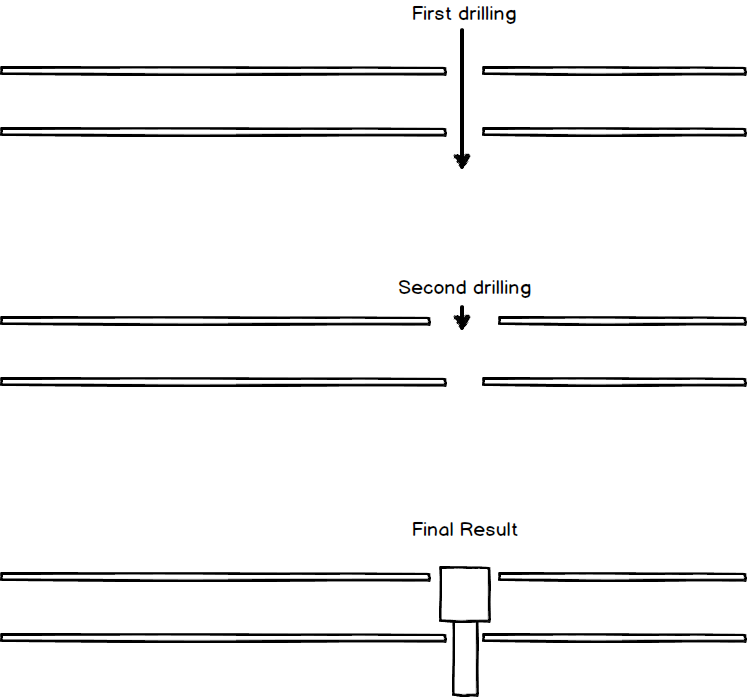
The way the underframe is built, it relies on two long bars that hold the two motors that allow the tabletop to move up and down. By simply shortening those bars, you are effectively reducing the size of the underframe. Everything else (more or less) works per normal.
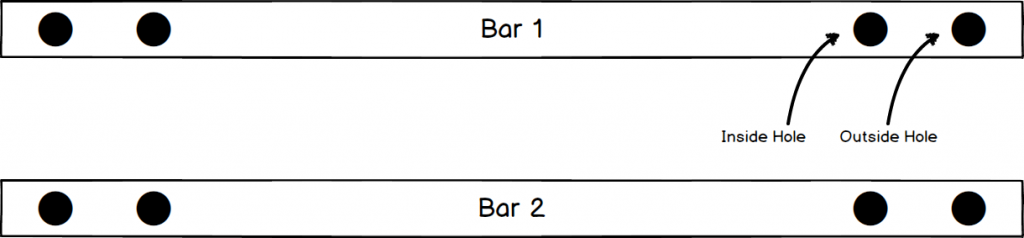
To make the cuts, you don’t even need to measure anything (well note we are using 55” tabletop. Other sizes might require measurements). You just need to line up the two bars side by side and then slide one of them so that the outside hole lines up with the inside hole (see figure). You then draw a line on the piece you need to cut and you repeat the same exercise for the other end of the second bar.
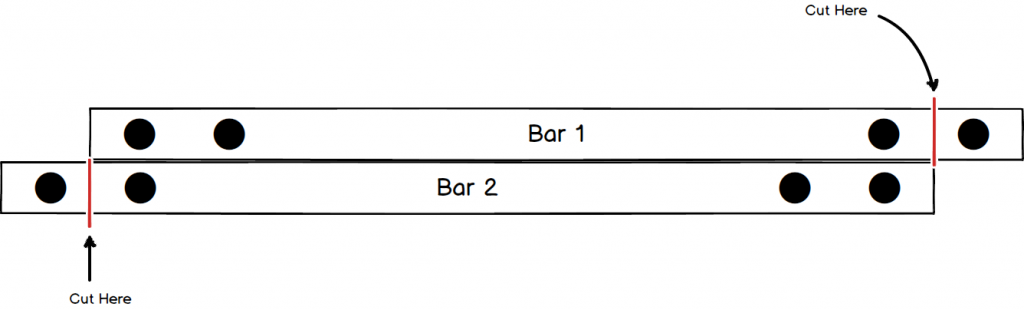
Make sure you don’t cut the same bar twice because you would then be SOL with one long bar and one short bar. To make the cut, make sure you use a blade that’s designed to cut metal. And safety goggles! Google Glass doesn’t qualify here. Once you have done your cuts, you can use a file to remove any shards.
4) Drilling the holes
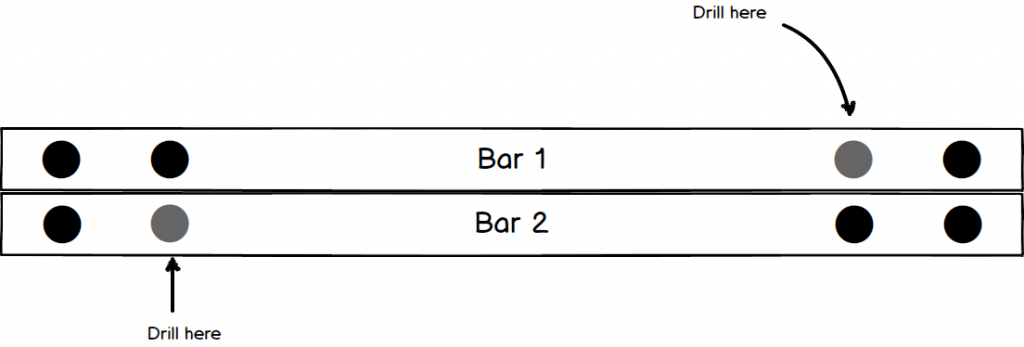
Once you have made your cut, you need to drill holes for the bolts. For each side, you will need to drill 2 holes. Those holes are meant for the bolts that hold the motor to the bars A small hole through and through both layers a tad bigger than the size of the thread part of the bolt but smaller than the head of the bold. And then a bigger one for only the top layer of the bar.
The position of the hole is simply done by matching the position of the other bar’s inside hole.
5) Attaching the table to the desk underframe
Once you have your adjusted bars, you can bolt them to the motors just like the regular IKEA instructions tell you to do. You can then bolt the end pieces to the each side of the bars/motor assembly. With the tabletop upside down on the ground, put the middle piece and lower the bars/motor assembly on the underside of the tabletop. Use a small drill bit to drill 16 lead holes (4 per each end sides and 4 for the middle piece). Use a washer and screw per hole to affix the underframe to the tabletop.

6) Putting it all together
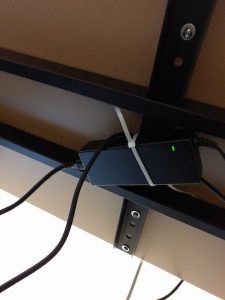
You can now plug all the necessary wires and affix the up/down control to the table just like you would on the normal setup. Again follow the IKEA instructions. One of the drawbacks of this setup is that you can’t use the mesh netting provided with the desk to hide all the cables and the power adapter. I use a few tie wraps to affix the power adapter to middle of the middle bar. I use a few twist ties to neatly bundle the excess wires.
7) Voila!
You are now ready to use your IKEA Frankenstein Sit and Stand desk and amaze all your friends.
Cautionary Notes
Since the motors are pretty heavy and that the screws used to affix the underframe to the tabletop are pretty short (and can’t be much longer), be gentle when carrying the table as you don’t want the underframe to come off. It hasn’t happened to us yet but best to be safe and use your fingers to hold the end parts of the underframe when carrying the table.
Share This Article